
20 kW solar system: Full Installation Walk-Through – The Tech Report
Introduction
This article is about the installation of a 20 kw solar system. The article explains everything you need to know and more about the installation of one of our reviewers.
Why I Purchased a 20 kw solar system
There are a lot of reasons I decided to have a big honkin’ solar array installed on my roof. I’ll get to the tangible ones shortly—backed by cold, hard data. The main reason that comes to mind, though, is less concrete. It’s a feeling, or an instinct; a desire to realize the expectations of my 20th-century childhood as a 21st-century adult. This is something I’ve wanted even before I plopped down my first solar power plant as an 11-year old SimCity 2000 mayor. My infatuation with solar arrays has grown.
Now, I understand that the emotional investment I have in this venture isn’t something everyone is going to share. Still, it’s an undeniable factor in my decision-making process. My parents were promised an inevitable fusion–powered, robot–filled, smart–home by science fiction when they were kids. Hanna-Barbera’s vision of the future may not have come to pass, but I want my daughters to grow up in that futuristic fantasy, so it’s up to me to deliver on that dream.
Possible Sound Investment
Beyond being simply a cool toy that I’ve wanted since I was a kid, or a sound investment I can make now that I’m all grown up, I consider this project to be a personal moral imperative. That may be a ironic phrase to invoke for what should be a by-the-numbers adventure, but I was happy to find that both my wallet and my conscience would be soothed by this endeavor. The math works out, but I’ll add this much: I’ve already left my mark on the planet, and now I want to erase it. I think this is a good start.
And so, it begins
Starting With Research
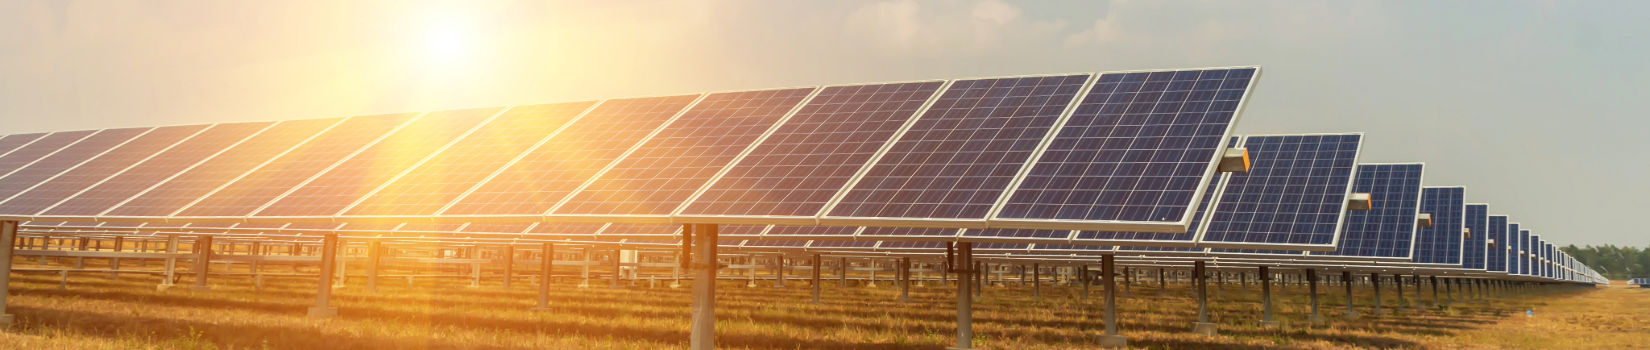
As any adventure should, I began with research. Question number one was, “does solar power even make sense in Michigan?” Following closely behind, there was a second question of “exactly how large of an installation would I need?” There are tons of calculators online for finding those answers, and I used more than a few to get multiple opinions. Ultimately all the numbers really clicked for me once I saw the map below. It breaks down solar irradiance into kWh-per-kW-of-panels-installed, per year.

Image source: solarpowerrocks.com
That image is backed up by the feds and other resources online. You can see that Michigan’s 1400 kWh/kW-yr ranking isn’t amazing, but it isn’t tragic either. Since my goal was to offset 100% of my electrical consumption with solar energy, the math here is pretty easy. All I had to do was add up my annual kWh usage based on my electrical bill, then solve for X. In 2018, our household included an entire extra family for eight months. That lead to an over-the-top electrical consumption of 25,650 kWh for the year. In 2017, our usage was more normal, clocking in at 20,263 kWh. Overkill is underrated, so I used the total from 2018 for my calculations. Also, solar panels lose about 0.5% of their production each year—another reason to aim high.
Backed by Peak Potential Output
A solar panel system’s capacity is expressed as its peak potential output, or kWp. I divided my consumption of 25,650 kWh by the 1400 kWh/kW-yr from the map and came up with a requirement of an 18.32 kWp system. The calculations aren’t quite that easy, though. There are other factors to consider, like the laws of physics. Any system is going to have efficiency losses. Roughly speaking, you’re talking about needing an extra 20-25% more capacity to counter those losses. That brings my requirements up to 22.9 kWp for my 2018 numbers and 18.09 kWp if I look back to my 2017 usage. With that, I had my rough estimate.
Of course, there’s still more to it than that. There’s potential shade to consider, as well as the directions the panels are facing, and the pitch of your roof. Those variables are a bit too specific to be within the scope of this piece, though. Just know that they will come into play when you start fooling with full-fledged solar calculators online. In my case, you’ll soon see that shade was not a problem for me. I do however have an east-west facing roof instead of a the idyllic southern facing one. As it turns out, that’s not nearly as significant a factor as it used to be with today’s modern panels and their prices.
Speaking of problems—Fish, you idiot. The. Sun. Goes. Down. That’s where “net metering” comes in, though. Net metering means you can bank credit with your power company when you produce more power than what you’re using. Think of it as using the electrical grid as a battery, at least financially. Alternatively, think of it as old-school rollover minutes on your cellphone. You’ll have to do your homework to see if it’s available where you live, but it made everything a lot easier (and cheaper) for me.
The Importance of Net Metering
Net metering is critical, because unless you plan on storing all the excess power yourself (more on that later), any solar panel array you invest in is only going to lower your bill while it’s actively generating power. You’ll still be drawing from the grid when it’s dark, cloudy, or when the panels are covered in snow. Without net metering, there would be no point to installing a system capable of producing more power than you use during the day. The bottom line is that with that ability, you can install whatever size system you want without having to worry about what to do with the power you’re not using in real time.

Number of minutes between sunrise and sunset for my latitude and longitude. Source: USNO
In my case, the type of net metering at my disposal means that any excess power I produce in a month carries over to the next month as a credit on my bill. I don’t get paid cash for producing more power than I need, but the credit stays on my account for 12 months. At that point, any surplus I may still have drops off. It’s early days yet for my system, but my hope for this year is that I’ll bank up enough credit over the spring, summer, and fall to be able to get through next winter (when the panels are covered with snow) by pulling from my credits. We’ll talk about how that’s working out so far in a bit, and my intention is to revisit that specific topic six months from now, and again six months after that.
Getting Serious About the Purchase
After my research, I had a rough idea of what size system I needed to generate my annual power requirements. I also knew that, even though I’m not afraid of some DIY work, this was more project than I could handle without help. It was time to get some quotes and figure out if my plan was even remotely practical. I mentioned that there are lots of solar power calculators online, but there are also a number of services that will collect your details and share them with installers so they can produce bids for the job. I ended up using EnergySage for this step in the process and I highly recommend it. Answer a few questions, share a recent electric bill, and then sit back and wait.
Getting Quotes
After a week or so, I ended up with quotes from three different installers, all of them operating within about four hours of where I live. EnergySage’s portal summarized the quotes and made them easy to compare. It also audited them to a degree, playing the role of a third-party fact checker. The portal provided a means of communication with the installers that didn’t require me to share my direct contact info, which was welcome for the early stages of dialogue with them. All the quotes ended up in the same ballpark for cost and payback, but there were some differences. Each installer had their own preference for what brand of hardware to use and how much of it would be needed. The warranties differed too, both for the hardware and for the labor.
After engaging everyone in conversation for a couple weeks, I fleshed out the quotes by adding a critical load panel and requisite battery to them. I ultimately chose Strawberry Solar to do the job based on its combination of price, warranty, responsiveness, reviews, and its choice of hardware. I’ll say this upfront: Strawberry was and continues to be a pleasure to work with. If you’re interested in a solar project of your own, and they’re a candidate to do the job, I highly recommend the company.
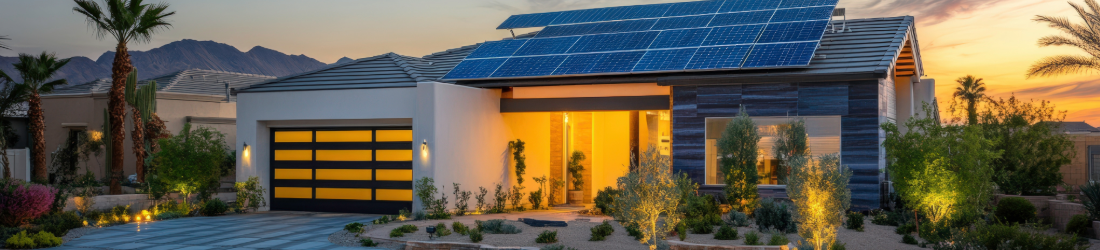
The process that lead to signing on the dotted line revealed one reason the quotes I got were so similar. It turned out that based on my electric usage, the system my household demanded was hitting the 20 kWp cap for residential solar power in Michigan. Even if that weren’t the case, any effort to go higher than 20 kWp would result in a “Category 2” program where I couldn’t get a credit for my power delivery rate, only for the supply rate. You can read details about that here, but it’s specific to my power company and could vary elsewhere. At any rate, the 20.13 kWp system that Strawberry landed on was right in the middle of my own estimate of 18-23 kWp, which was fine by me. The 20 kw solar system would be installed.
As things worked out, the system Strawberry installed ended up being 20.46 kWp. That number is reached by multiplying the 62 panels on my roof by their rated peak performance of 330 W each. The original quote was for 61 panels, but Strawberry tossed in a freebie to make the array look nicer. As it turns out, the installers were just as excited about setting up a big honkin’ system like mine as I was. I asked about the size of the system putting me over the limit for “Category 1” net metering, but I was assured that inefficiencies in switching DC to AC power meant that having slightly over 20 kWp in panels was not a problem. In fact, the two inverters in my basement only total up to 19 kW anyway.
The Hardware of a 20 kw Solar System
The Hardware Specifics (not too technical)
Speaking of the inverters, let’s dive into the specifics a bit. Fair warning: this won’t be a technical deep dive. It’s just to whet your appetite with an idea of what one of these systems looks like, and what, uh, powers it. A lot of new stuff got added next to the existing electrical panel in my basement. There’s a new meter, a transformer, two inverters, a critical load panel, a box for breakers that allows both inverters to charge the battery, the battery itself, and a large raceway full of wires that connect everything together. We’ll take a quick look at each piece.


The meter is an unassuming box with an important job: it tracks incoming and outgoing power from the grid. It’s also responsible for making sure that power from the system doesn’t feed back to the grid when there is an outage, ensuring the safety of folks working to restore power. The transformer handles switching the DC power from the battery into AC power that can be used by anything connected to the critical load panel during a power outage.
The critical load panel doesn’t have any particular smarts; it’s just full of normal breakers. However, in the event of a power outage, the items hooked up to it will continue to run, either directly from solar power coming from the inverters or from the big battery, by way of the transformer. Regardless of how much solar energy is being produced, only the critical load panel will have power during an outage. We’ve got our sump pump, furnace, refrigerator, a circuit that power’s Ellie’s room, and our cable modem and router hooked up to it. In the event of an outage, the basement will stay dry, the house will be warm, food’s chilled, Ellie’s humidified, and battery-powered devices online.
The battery itself is an LG Chem RESU, and it can store 9.8 kWh. Based on the loads it sees, that should be enough to last through most nights until the panels can take over and charge it up during the day. Hopefully, we don’t have to deal with many outages that last that long, though. I can’t stress enough how much peace of mind having the battery in the system gives me. Even if it was just for the sump pump alone, it would save me a ton of stress. In the worst-case scenario, it’s a huge buffer between when the power goes out and when I need to fight with the generator.

9.8 kWh ought to be enough for anybody.
We have the battery configured so that power is not typically drawn from it unless there is an outage. It could be configured in such a way as to minimize our power draw from the grid, but thanks to net metering, that isn’t a big concern for me. Instead, I’d rather make sure the battery is always topped off and ready to go in the event of an outage. The controller maintains the battery by automatically cycling it to optimize its lifespan.
More on The Hardware Specifics
When the system was first powered on, the battery was only 20% charged. I watched in astonishment as it drew 5,000 W directly from the solar panels to charge itself at the rate of about 1% a minute. It was nuts! So far, we’ve only had one small power outage to let us see what the battery could do. Everything worked exactly as planned, which ended up meaning the critical load panel ran directly from the solar panels and never touched the battery. Daytime outages: solved. I continue to be both nervous and excited to see what happens during a longer outage when it’s overcast and rainy the next day. Will the battery make it through the night? Will the panels be able to charge it the next day? I don’t want the power to go out, but I do want answers to those questions.

The cat room will never be the same.
Finally we get to the inverters, a SolarEdge SE11400 and a SolarEdge SE7600. They are 11.4 kW and 7.6 kW respectively, totaling up to the 19 kW I mentioned previously. They are attached directly to the Canadian Solar panels and SolarEdge power optimizers on the roof. By the way, mad props to the electricians that hooked all this gear up. It’s so organized, and I think it looks awesome. They also managed to fish the wires from the roof-mounted panels through the roof, down an interior wall, and into the basement without so much as a single hole in any of my drywall. Very impressive.
Length of Installation
The installation of all the hardware in my basement took about three eight-hour days for two electricians. That happened after four people spent two eight-hour days installing all of the panels on the roof. Since I was never up on the roof myself, I’m not going to go into great detail about the installation process, but I will say that I know they used hardware from IronRidge and that everything on the roof was drilled right into the trusses. The flashings that were used were tucked under the roof’s shingles and sealed with tar on the bottom. No worries about leaks here.
Did I mention that the installation was originally scheduled for the week of the great 2018 polar vortex? Yeah, we had to reschedule it for the following week, but it was still wet, bitter cold, and windy. The install team were beasts. Here’s a few pics of the initial install.
I’ve also got a video from the deck on the other side of the house right after they finished putting the panels up.
[embedded content][embedded content]
There’s not that much snow, but the temp was barely in the double digits and wind was well into them.
Here’s some obligatory drone footage as well; more of that to come.
[embedded content][embedded content]
Don’t worry, I got a haircut shortly after seeing myself in this footage.
Final Costs, Specs, and Rewards
That’s a fair question. Let’s break down the costs, and compare them to my electric bill for a rough idea of what the ROI looks like. I’m not going to pussyfoot around—this is hard data, albeit with slightly-rounded numbers for simplicity. The complete system cost $65,000. I’ve been planning on this for a long time and was able to pay $15,000 down. We got a home equity loan for the remaining $50,000. It’s a 12-year loan with payments of $475 a month. My family-heavy electric bill averaged $350 a month last year, and in 2017 it averaged $275 a month. If you take the absolute worst-case scenario where electric costs don’t go up, I don’t pay off the loan early, and we use the 2017 bill for comparison, the system will pay for itself in 27 years. Oof.
Thankfully, that’s not how things are going to go down. For one, and this is a big deal, there’s currently a 30% tax credit from the feds that you can claim for solar projects. That works out to $19,500 in taxes that I don’t have to pay until it’s used up. By the way, and this is also a big deal, 2019 is the last year that tax credit is 30%. Next year it drops to 26%, and it only gets lower from there until it’s gone. You can only claim the credit if your system is installed and operational before the end of the year, so get cracking if you’re interested, because it will take a least a few months to get one in place.
With the tax credit as part of the equation, the EnergySage portal produced an estimated payback date of 8-10 years based on the data I fed it once they had my quotes. It gets speculative from here, because my electrical consumption is lower than what I advertised, and I plan to pay off my 12-year loan in closer to four years to avoid much of the interest. My best guess is that if my electrical consumption remains the same and electrical costs remain the same, I would get a full return on the investment in close to 14 years.
However, I expect to use more power as time goes on (an electric car is up once the solar loan is paid off), and electrical costs will rise, so 10-12 years seems a more likely timeframe. Of course, the system is going to last another 20 years or so beyond that. Minus some maintenance costs, everything it saves after that is money in the bank. By the time the system reaches its end of life, it will not only have paid for itself, but it should also have saved me well over $100,000. In 2052, that could be enough money to get my inevitably decrepit 70-year old body to Mars and turn it into fertilizer. I’m more than half-serious. I can hear my future-self pontificating now: “your ironically named Mr. Fusion may run off Bananorango® peels but my antique solar panels still charge my exoskeleton just fine, dagnabbit!”
Anyway, that’s the situation for me. A lot of things could be different for you, and I encourage you to look into your options. Much of the pitch for solar that you see is that you can straight-up trade your electric bill for a loan payment. That’s definitely not true in my case, but it certainly could be for others or, even for me if I had done things differently.
System performance
With all the exposition out of the way, we can finally get to how the system is performing. For only having it producing power for a couple months, I feel like I’ve seen it running in a pretty wide range of conditions. It handles some situations better than others, but overall it’s outperforming my expectations, especially in inclement weather. No, it doesn’t magically produce power when the panels are completely covered in snow, but in cloudy, rainy, or snowy weather it manages to generate a surprising amount of energy nonetheless. All the details regarding production are visible through the SolarEdge web portal and companion app. Check it out:

I spend an unhealthy amount of time staring at “my numbers.”
This is my data. Isn’t it lovely? I think the numbers speak for themselves, but to summarize, it shows me everything about how much power is being generated and consumed in near-real-time. I can see my various totals for the day, week, month, and year. It even shows me the state of my battery since one of the inverters is its boss. The data in this image is from 14:30, near peak time for production. You can see that the system is absolutely obliterating the household’s meager demand for power and is putting 85% of the power being generated back onto the grid. This will be a common theme.
‘Not bad for mid-March.
This screenshot is from a different day, but the story is largely the same. The partial graph above begins to tell the story of how net metering and my geographical location need to work together. Simply put, I’m not just looking at things on a day-to-day basis. In order for my system to completely eliminate my electric bill, I need it to cast a wide net and catch as much sun as possible whenever the opportunity presents itself. Generating two, three, or maybe four times as much power as I need in 24 hours is necessary to bank up enough credit to get through the months of the year where the panels are unlikely to see much sun at all thanks to the snow.
Before you ask, it’s generally frowned upon to clear snow off panels. They are hard to reach and there’s a non-negligible chance of damaging them, but it can be done if you’re so inclined. If they aren’t covered in snow, they actually perform better in the cold. Hooray for silicon!
The panels on the top are facing west, so I guess it must be past noon.
On the “layout” page of the portal, you can see the arrangement of the panels on the roof and get both real-time and historic performance data per individual panel. It’s extremely cool, but it’s also a bit flakey. I’m still working with Strawberry and SolarEdge to make sure everything with this reporting tool is working correctly with my setup, because I sometimes see unexpected numbers here. That said, it’s clearly only a cosmetic problem, because the system is generating power correctly and the reported totals align with what my power company is seeing from its meter.

Just a little bit of power coming in where the snow has melted.
Information wants to be free
One of the coolest things about the SolarEdge portal—and the reason I didn’t cover it in more detail—is that you can make the data for your installation publicly available. That’s exactly what I’ve done, to the full extent that I can. Use this link to go directly to my own personal site, nicknamed Sunfish. You can also browse other public sites here. You won’t be able to see exactly the same information I can, but you can view real-time performance, the layout of the panels, and all the historical data any way you want to slice it.
That feature is nice and it was real easy to set up, but I wanted to give gerbils more than just graphs. I wanted them to see the weather that goes with them, so I settled on procuring a dedicated time lapse camera with a weather resistant housing and making sky-watch videos with a performance graph overlay. Here’s an example of what I ended up with.
[embedded content][embedded content]
A classic mid-April Michigan snow storm made for a cool set of back to back videos.
I’ve got a growing playlist here if you want to check out more. I thought it was important to show people exactly how the performance of solar power matches up with what’s going on in the sky. I intend to keep adding to this playlist in batches—the camera is outside 24/7, and I’ll pull the daily videos off it once a week or so. How long I’ll keep this running will depend on how interesting people find it, so let me know what you think and please share it if you find it worthwhile. I have no shortage of ideas for other uses for the camera, but I’ll keep it pointed at the sky if people are enjoying the view off our back deck. Personally, I’m excited to string a bunch of these videos together later in the year and produce a high-speed playback of the field growing up.
A Look at The Fully Installed System
Speaking of views, it’s about time I shared a proper look at the fully installed system. Here’s some more drone shots.

I had this project in mind when we bought this house close to four years ago. Even at the time, I knew that a large, southern-facing roof would be more ideal, but after checking out those photos, I’m pretty sure you’ll agree that the house was a pretty good candidate for roof-top solar regardless. There’s no shadow cast on the roof from anything on the ground, and since the panels face east and west, they collect sun early in the morning and they do late into the evening. The best times for production change throughout the year, but right now in late April, the peak appears to be happening from 13:15 to 14:15 when the panels on both sides of the roof are collecting energy at the same rate.
More Videos for Perspective
Here are a couple more videos for additional perspective.
[embedded content][embedded content]
When I watch this, I still think the panels look like CGI.
[embedded content][embedded content]
Seriously, with the weather from that day, the panels just look freaky up there.
Again, you can really see how our house sticks out of the small peninsula of a private drive, right out into the middle of open fields with no trees or buildings blocking the sun. We’re not even close to the longest days of the year yet, and my panels are already generating more power than the house is using from about 08:00 to 20:00, if there aren’t too many clouds. I love it.
Speaking of the weather, I’ve never been more in-tune with it, nor have I ever appreciated sunshine more (or, you know, at all). Everyone knows about the weather rock, but my solar panels actually work similarly. I can look back through my SolarEdge data and tell a lot about how the weather must have looked that day. Increasingly, I’m able to see the weather forecast and predict how many kWh the system will likely produce.
It’s a fun new aspect of conversation to have around the house as well as at the office, where some of my coworkers are nearly as obsessed with my numbers as I am. As a side note, my system inspired one of my coworkers to install 6.4 kW of panels on his own home. He’s taking a DIY approach and won’t have it finished for a few months, but his investment will probably be less than half the dollar-per-kW price tag of my professionally-installed system. Just something to keep in mind if you’re handy enough.
Final Thoughts on the 20 kw Solar System Installaton
Over a month ago, we put up a poll asking folks what their household’s average kWh usage is. Even though the results of any online poll should be taken with a massive helping of molten salt, I feel confident that my vote of 61-75 kWh definitely places me in the upper echelons of power usage. Even if we only look at the close-to-40-kWh average that my house has used through March and April, I’m still above average for gerbils. The nice thing about solar projects like mine is that they scale pretty well, and as long as your roof has a clean view of the sky, the ROI is probably similar no matter where your usage falls. I suppose what I’m trying to say is that the concept is worth at least looking into, especially when the feds will give you a 30% tax credit.
This story isn’t over, not by a long shot. I’m only two months into a 30-year-long endeavor. My biggest takeaways so far are that in less than 60 days I’ve produced 60% more power than I’ve consumed, and I’ve exported a little over twice as much as I’ve imported. Funnily enough, I’ve become so cognizant of my power consumption that I’m using measurably less even though I have a significant surplus.
That all feels good, but I’ve yet to turn on the AC this year, and that will certainly have a dramatic impact on usage. The same lack of shade that makes my house good for solar also makes it a bear to keep cool. I hope that with longer days coming, I’ll be able to continue building up my electricity credit despite the need for AC, and get myself through the winter without paying for power. I didn’t have an electrical bill for March, and I won’t have one for April. I’d love for that to be true for every month going forward.
That’s one huge reason for doing this, after all. Well, that and zombie preparedness. I have no illusions of surviving a zombie apocalypse—rule #1 is a problem—but that doesn’t mean my house can’t be an electric oasis for someone else.
I’m less than half-serious about that one.
More in the Future!
I’m going to revisit this story at least twice more: once after the summer is over, and again after next winter. I’m looking forward to sharing stories of production records being broken (125 kWh is the number to beat so far), the LG battery backup saving the day, and filling in some of the other details I haven’t gotten to in this first brush with the topic. If you found what I’ve shared so far valuable or at least interesting, please share it with others and let me know what you think. I’ll check in with you again in October.
Related Post: Top 7 Outdoor Projectors to Check Out This Year
 Our Editorial Process