

Sun On The Run: Diving Into Solar With A Mobile PV System – Hackaday
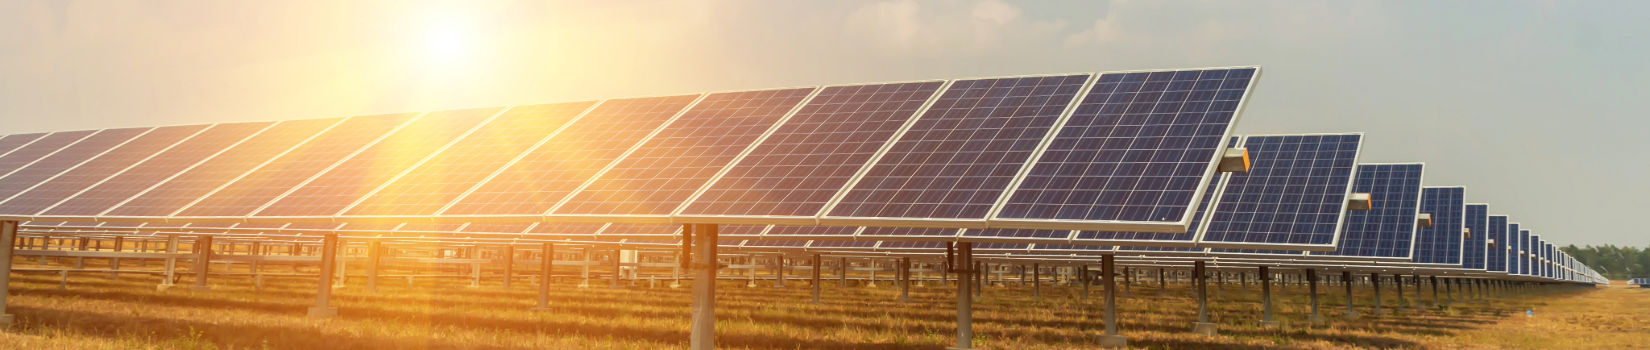
For obvious reasons, there has been a lot of interest in small-scale residential solar power systems lately. Even in my neck of the woods, where the sun doesn’t shine much from October to April, solar arrays are sprouting up on rooftops in a lot of local neighborhoods. And it’s not just here in suburbia; drive a little way out into the country or spend some time looking around in Google maps and it won’t take long to spy a sizable array of PV panels sitting in a field next to someone’s ranch house or barn.
Solar has gotten to the point where the expense of an installation is no longer a serious barrier to entry, at least if you’re willing to put in a little sweat equity and not farm the project out to a contractor. Doing it yourself requires some specialized tools and knowledge, though, over and above your standard suite of DIY skills. So, in the spirit of sharing hard-won knowledge, I decided to take the somewhat unusual step of writing up one of my personal projects, which has been in progress for a couple of years now and resulted in a solar power system that isn’t on a rooftop or a ground-mounted array at all, but rather is completely mobile: my solar trailer.
The Big Idea
Right up front, I’ll admit that this project is a little weird. It sure raises eyebrows around the neighborhood; I can’t count the number of people who stopped to chat while I was working on it in the driveway, neighbors and total strangers alike. It’s a conversation starter for sure, which of course has its pros and cons itself. So what’s behind the design?
The idea started forming in my head some time ago, probably at least five years ago. I wanted to build a solar system but I didn’t particularly want one on our house. We have a very poor solar aspect in my neighborhood, populated as it is with thousands of towering Ponderosa pines. I’ve got a southern-facing roof that could comfortably hold perhaps a dozen PV panels, but to get sun on them for even part of the day I’d need to cut down at least six large trees, most of which are on the property of my neighbors to the south. At about $1,000 to remove each tree, plus lacking the desire to penetrate our brand-new shingles, the idea of a roof-mounted array was a non-starter.
There was another factor, though, one that I found more compelling and pretty much drove the design in the end. I really wanted a solar installation that could be moved around, something that I could use not only at my house but also at any rural property we might choose to buy someday. And “rural” means something in North Idaho; it’s very easy to find property that’s far enough away from any infrastructure that running wires to it is a practical impossibility. We were quoted $18,000 to run electrical service to one property we looked at, and that didn’t include the cost of conduit, excavation, and copper. And that was on a road where there were already power lines. It seemed like there were better ways to spend $18,000.
That’s when I came up with the idea of adorning a utility trailer with solar panels. With panels on the top and along one side and plenty of room inside for batteries and other equipment, I could have a mobile powerhouse that could easily be transported to any off-grid property we’d like, or parked at home to provide backup power. The trailer would serve to protect the sensitive electronics from the elements, secure it at least somewhat from vandals and thieves, and as a bonus provide some storage space for tools and equipment. It would also be easy to reposition it for optimal solar aspect, another big plus.
The decision to make a solar trailer came not a minute too soon, because right after I bought the trailer, the pandemic-induced trailer-to-tiny-house conversion craze started and there wasn’t a trailer to be found. I got the biggest trailer I could afford and spent the summer of 2020 converting it.
The first job was insulating it, as I figured a stable temperature would be better for the batteries and electronics inside. I ripped out all the walls, ceiling, and floor, filled the spaces with extruded polystyrene foam insulation, and replaced the wood. I also lined the exterior of the chassis with galvanized sheet steel, to protect the insulation from rodents.


Mounting the Arrays
” data-medium-file=”https://hackaday.com/wp-content/uploads/2024/01/IMG_20200903_133553670.jpg?w=400″ data-large-file=”https://hackaday.com/wp-content/uploads/2024/01/IMG_20200903_133553670.jpg?w=800″ class=” wp-image-655999″ src=”https://hackaday.com/wp-content/uploads/2024/01/IMG_20200903_133553670.jpg” alt width=”312″ height=”175″ srcset=”https://hackaday.com/wp-content/uploads/2024/01/IMG_20200903_133553670.jpg 3264w, https://hackaday.com/wp-content/uploads/2024/01/IMG_20200903_133553670.jpg?resize=250,141 250w, https://hackaday.com/wp-content/uploads/2024/01/IMG_20200903_133553670.jpg?resize=400,225 400w, https://hackaday.com/wp-content/uploads/2024/01/IMG_20200903_133553670.jpg?resize=800,450 800w, https://hackaday.com/wp-content/uploads/2024/01/IMG_20200903_133553670.jpg?resize=1536,864 1536w, https://hackaday.com/wp-content/uploads/2024/01/IMG_20200903_133553670.jpg?resize=2048,1152 2048w” sizes=”(max-width: 312px) 100vw, 312px”>
Next up: solar panel mounts. My PV panels are Renogy 270-watt 24-volt panels. I bought eight, but my trailer was only big enough for six — three on the side, and three up top. I wanted to be able to fold the panels flat against the trailer for travel but pop them out for use, and hopefully adjust their angle for differing solar heights during the year.
I puzzled over how to do this for a long time until finally hitting on the idea of frames bolted together from standard electrical construction materials: EMT, or electrical metallic tubing, and Unistrut. My original plan had been to use 8020 aluminum extrusions, but the other stuff is much easier to get, and the galvanized finish is good for outdoor use. The adjustability of the arrays is thanks to these interesting fittings, which are aimed at hipsters who want to make shelves and desks from pipe. With a little modification, these (admittedly expensive) fixtures fit the EMT conduit well and allowed me to make each array hinged and adjustable.
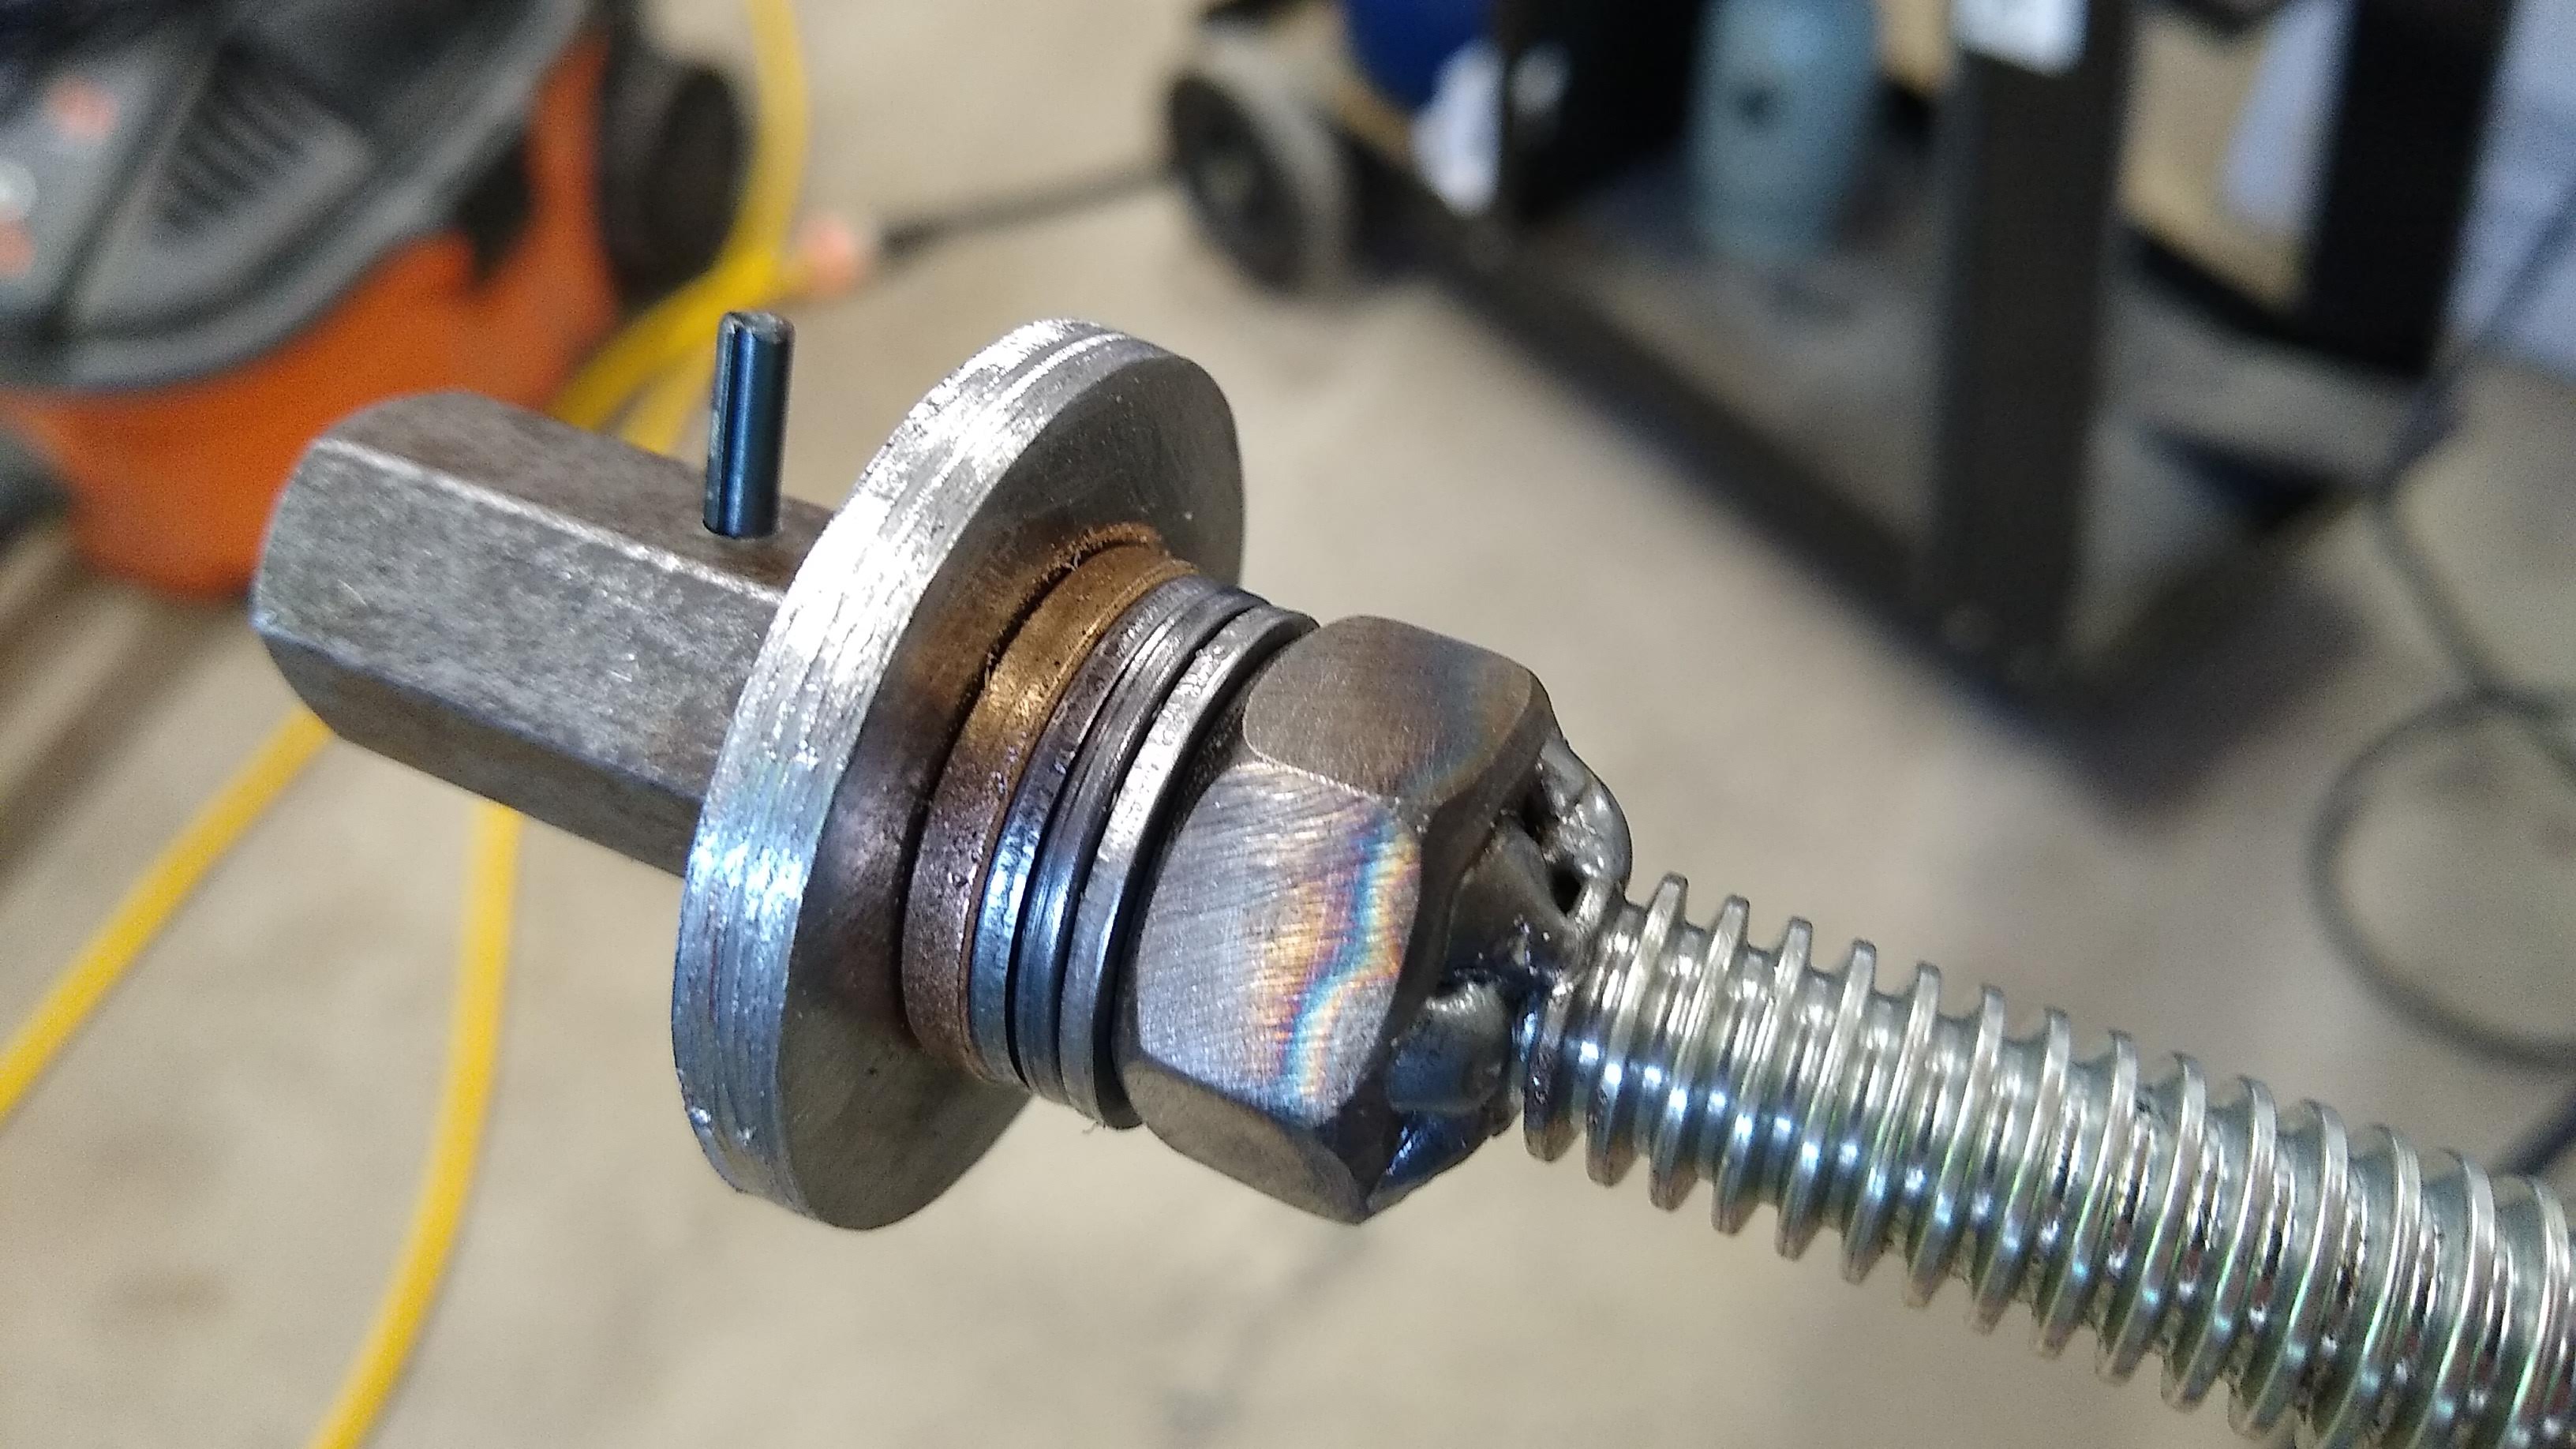 Screw jack detail, before welding into a piece of pipe. The drive end has a thrust bearing and a bronze bushing, while the other end is screwed into an Acme nut welded into the smaller diameter pipe.
” data-medium-file=”https://hackaday.com/wp-content/uploads/2024/01/IMG_20210530_121757795.jpg?w=400″ data-large-file=”https://hackaday.com/wp-content/uploads/2024/01/IMG_20210530_121757795.jpg?w=800″ class=”size-medium wp-image-656002″ src=”https://hackaday.com/wp-content/uploads/2024/01/IMG_20210530_121757795.jpg?w=400″ alt width=”400″ height=”225″ srcset=”https://hackaday.com/wp-content/uploads/2024/01/IMG_20210530_121757795.jpg 3264w, https://hackaday.com/wp-content/uploads/2024/01/IMG_20210530_121757795.jpg?resize=250,141 250w, https://hackaday.com/wp-content/uploads/2024/01/IMG_20210530_121757795.jpg?resize=400,225 400w, https://hackaday.com/wp-content/uploads/2024/01/IMG_20210530_121757795.jpg?resize=800,450 800w, https://hackaday.com/wp-content/uploads/2024/01/IMG_20210530_121757795.jpg?resize=1536,864 1536w, https://hackaday.com/wp-content/uploads/2024/01/IMG_20210530_121757795.jpg?resize=2048,1152 2048w” sizes=”(max-width: 400px) 100vw, 400px”>
Once I got the six PV panels mounted I ran into my first major problem: these arrays are heavy. I imagined that I’d be able to stand the roof array up manually while standing on a ladder, but the near-death experience I had the first time I tried it was enough to convince me I needed help. I bounced around a lot of ideas before I designed a simple screw jack using a long Acme threaded rod running inside two nested pieces of EMT.
Luckily, 1-1/4″ diameter EMT nests nicely inside the 1-1/2″ stuff, making it easy to make telescoping assemblies; I took advantage of this fact to make the telescoping support arms for the array. Of all the aspects of this build, I’m particularly proud of the panel jack. I did some real mechanical engineering to decide on materials — Euler’s column formula to figure out how much load the screw would take before buckling, and torque equations to figure out if the jack would be able to lift the panel. And it works — I just put a 7/8″ socket on my cordless drill and run the panel up while standing on the ground, safe and sound.
Wiring Things Up
With the mechanical parts of the build largely addressed, it was time to move on to the electrical build. Ironically, this part gave me more pause than the mechanical build. I’m not any sort of engineer, but I’m far more comfortable with electrical engineering concepts than I am with mechanical engineering. But still, I was mindful that I’d be dealing with a lot of power, both on the DC side and with the AC, and coupled with visions of lithium battery fires, I was perhaps just a wee bit scared that I’d get something catastrophically wrong.


There was also the need to pick out the right equipment. This would need to be an off-grid system, as opposed to a grid-tie system. Grid-ties can be simpler since they don’t have batteries; when there’s extra power they just ship it off to the grid instead of storing it locally. My off-grid system would need not only batteries but an MPPT controller to manage charging from the PV arrays as well as an inverter to convert DC to AC. I did a lot of research before finally landing on a Growatt 3000-watt 48-volt hybrid inverter/charger — it’s been discontinued but this one is comparable.
The inverter was an easy Amazon purchase. Batteries, however, were another matter. After a lot of hemming and hawing, I ordered some used 48-volt, 3.2-kWh rack-mount LG batteries from Battery Hookup — they were a one-time deal, so don’t bother to look for them. Using guidance from a video by David Poz, I stripped out the proprietary 14S 2P battery management cards and installed a 100A BMS in each.
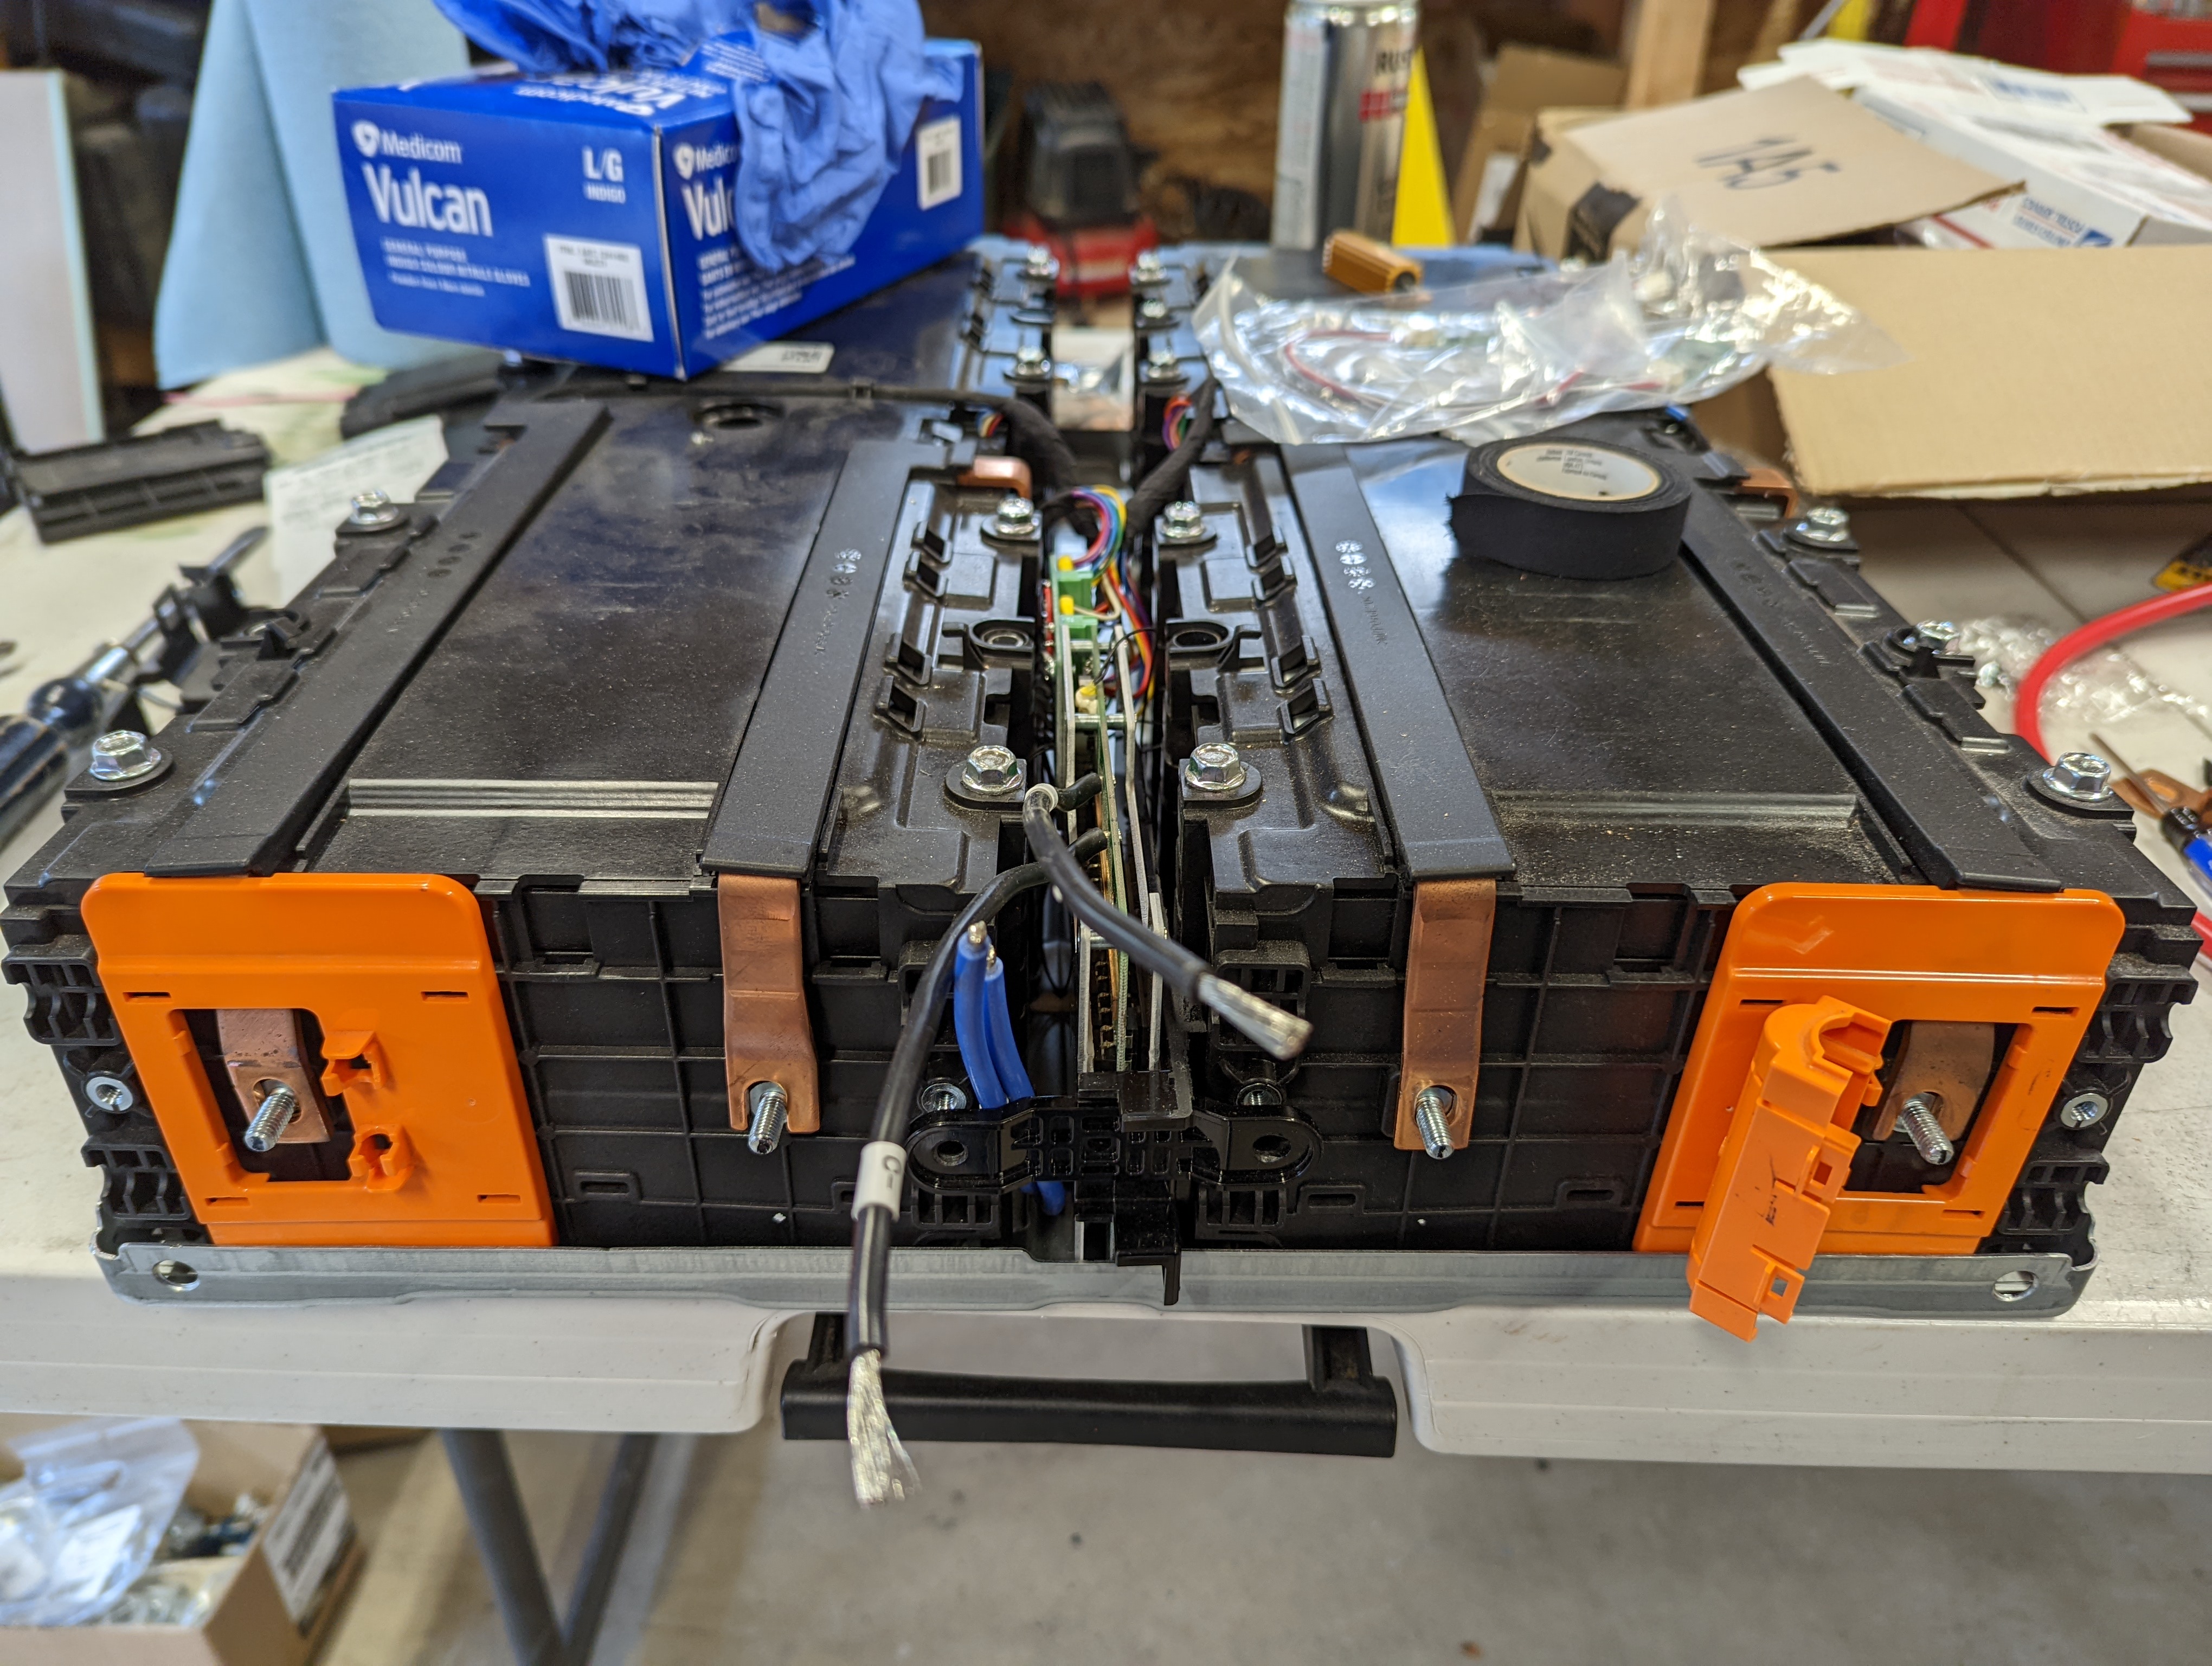 Original 48-volt batteries under construction. The 100A BMS fit nicely in the space between each 24-volt pack, but it always made me antsy.
” data-medium-file=”https://hackaday.com/wp-content/uploads/2024/01/PXL_20220325_010622046.jpg?w=400″ data-large-file=”https://hackaday.com/wp-content/uploads/2024/01/PXL_20220325_010622046.jpg?w=800″ class=”size-medium wp-image-656006″ src=”https://hackaday.com/wp-content/uploads/2024/01/PXL_20220325_010622046.jpg?w=400″ alt width=”400″ height=”301″ srcset=”https://hackaday.com/wp-content/uploads/2024/01/PXL_20220325_010622046.jpg 4080w, https://hackaday.com/wp-content/uploads/2024/01/PXL_20220325_010622046.jpg?resize=250,188 250w, https://hackaday.com/wp-content/uploads/2024/01/PXL_20220325_010622046.jpg?resize=400,301 400w, https://hackaday.com/wp-content/uploads/2024/01/PXL_20220325_010622046.jpg?resize=800,602 800w, https://hackaday.com/wp-content/uploads/2024/01/PXL_20220325_010622046.jpg?resize=1536,1157 1536w, https://hackaday.com/wp-content/uploads/2024/01/PXL_20220325_010622046.jpg?resize=2048,1542 2048w” sizes=”(max-width: 400px) 100vw, 400px”>
While these batteries work fine for what they are, I have to admit that their homebrew nature gnawed at me. The idea that a simple wiring mistake could result in a fire that would destroy years of hard work was hard to handle. Coupled with the fact that my testing revealed that they only had about a quarter of their original capacity left, I decided that it was time for “big boy” batteries.
There are a ton of rack-mount, 48-volt lithium batteries out there, some of better quality than others. I watched a lot of teardowns by Will Prowse before settling on a pair of Ruixu 100-Ah server-rack batteries. Along with their knock-down bracket racks, bus bar kits, distribution cables, and most importantly, a UL1973 listing, they make a nice addition to my system. Although I will admit that since it was -13°F (-25°C) at the time of writing this, I wish the self-heating option had been available when I bought them.
Fit and Finish – Almost
When I build something or tackle any project, I try my hardest to work up to the professional standards of the job as best I understand them. While I didn’t have much to go on for the mechanical end of this build, and it remains to be seen if the panels will stay on the trailer when it’s being towed at highway speeds, I’ve got a little more experience with electrical wiring. So I tried to make all the wiring as tidy and professional as possible. On the DC side, I invested in a dedicated crimp tool for MC4 connectors, the industry standard for PV applications. I used the appropriate gauge wire for stringing together the arrays, a fused and surge-protected PV combiner box to make connections between the top and side arrays, and proper weatherproof penetrations to get the PV wires inside the trailer. I was extremely cautious with battery wiring, too, using oversized welding cable and a ratcheting crimper to attach properly sized copper lugs, and made sure to use the correct DC circuit breakers to protect the batteries.
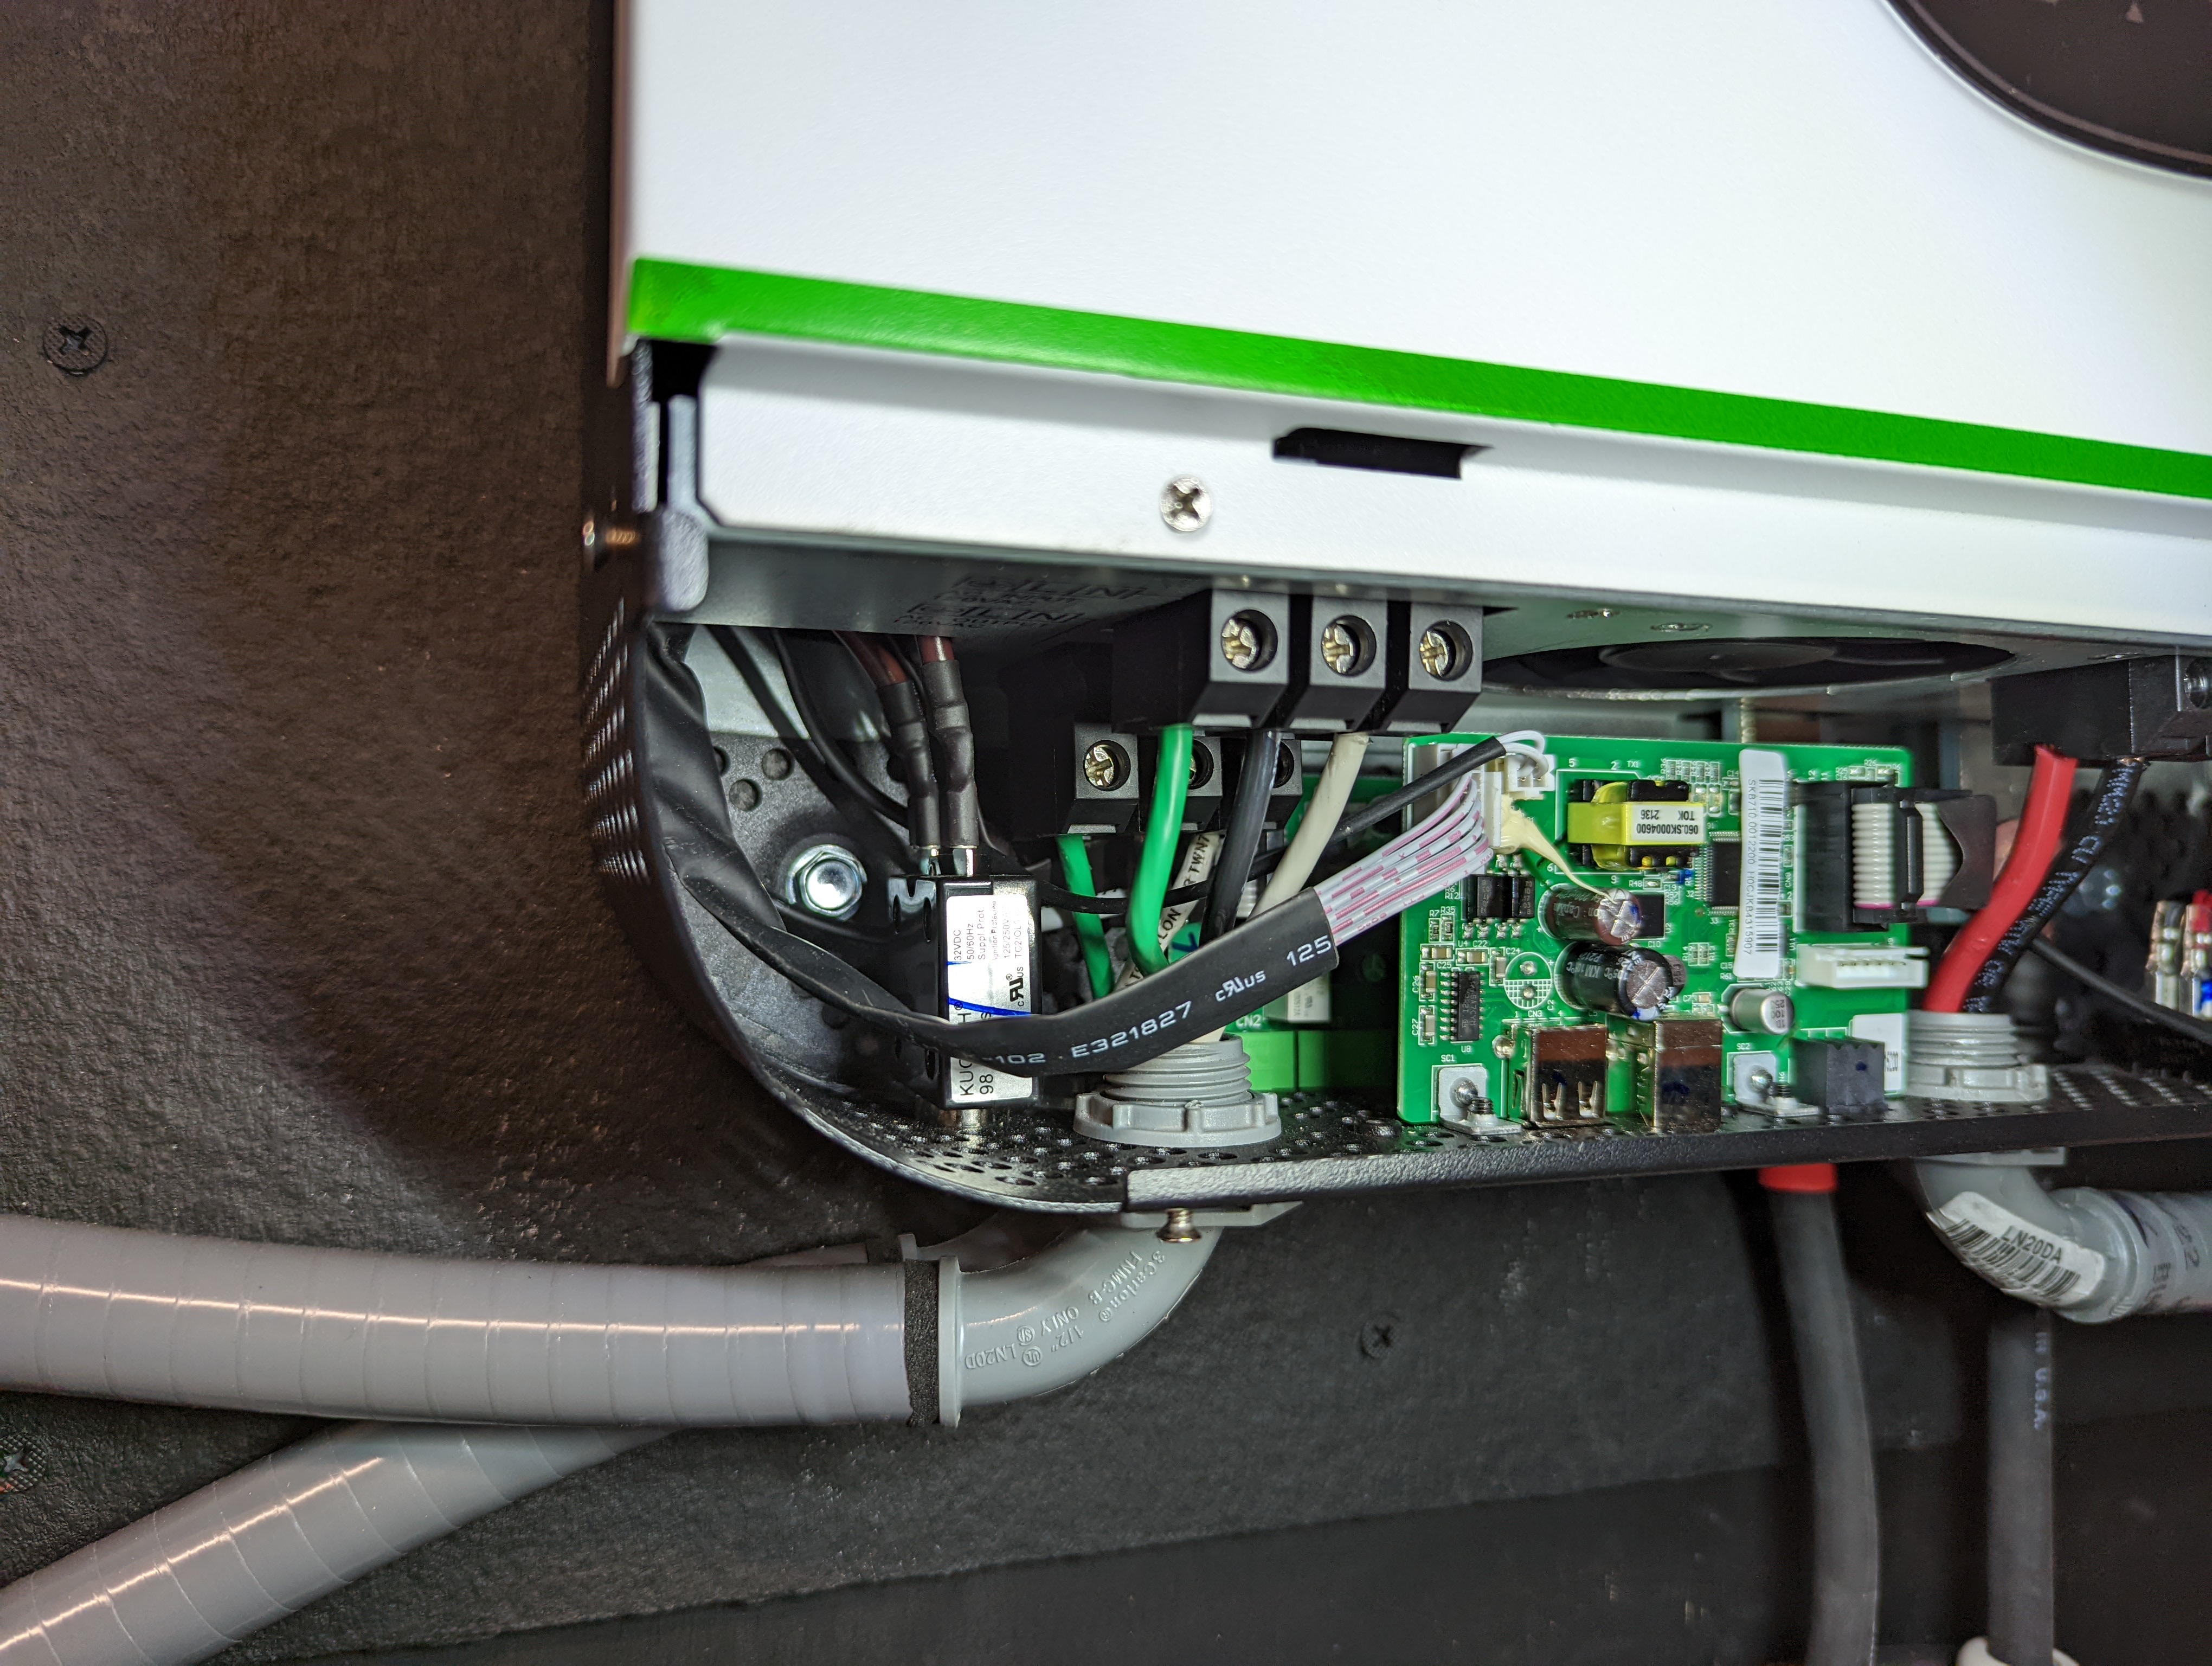 Growatt doesn’t leave a lot of room for AC wiring, but flexible conduit helped a bit.
” data-medium-file=”https://hackaday.com/wp-content/uploads/2024/01/PXL_20220325_010422590.jpg?w=400″ data-large-file=”https://hackaday.com/wp-content/uploads/2024/01/PXL_20220325_010422590.jpg?w=800″ class=”wp-image-656009 size-large” src=”https://hackaday.com/wp-content/uploads/2024/01/PXL_20220325_010422590.jpg?w=800″ alt width=”800″ height=”602″ srcset=”https://hackaday.com/wp-content/uploads/2024/01/PXL_20220325_010422590.jpg 4080w, https://hackaday.com/wp-content/uploads/2024/01/PXL_20220325_010422590.jpg?resize=250,188 250w, https://hackaday.com/wp-content/uploads/2024/01/PXL_20220325_010422590.jpg?resize=400,301 400w, https://hackaday.com/wp-content/uploads/2024/01/PXL_20220325_010422590.jpg?resize=800,602 800w, https://hackaday.com/wp-content/uploads/2024/01/PXL_20220325_010422590.jpg?resize=1536,1157 1536w, https://hackaday.com/wp-content/uploads/2024/01/PXL_20220325_010422590.jpg?resize=2048,1542 2048w” sizes=”(max-width: 800px) 100vw, 800px”>
On the AC side, inverter inputs and outputs use industry-standard enclosures and fixtures, and everything is protected by circuit breakers and GFCIs. I am not a licensed electrician, so I can’t vouch for anything I did as being “up to code.” I did try to work to a good level of craftsmanship, though; after all, I don’t want to kill myself or anyone else thanks to a careless mistake. One area I know I have more work to do is grounding. The PV arrays are all bonded together, and everything is tied to the trailer chassis right now. But I need to add a ground connection for off-grid use. Right now, the trailer is grounded through the shore-power connection, but if I were use this away from my house, the ground would be floating, and that’s not good. Also, the Growatt inverter internally connects neutral to ground, which isn’t good since the National Electric Code requires that neutral and ground only be bonded at the service entry point. I need to add a relay that will break the connection between ground and neutral inside the inverter while the trailer is connected to shore power; I have the materials to do it, but the project has been on my to-do list for far too long.
Also on my list are niceties such as a dedicated power drive for the panel jack so the PVs can be retracted automatically in high winds, an automatic start signal to turn on a generator for true off-grid use, and built-in heaters for the batteries. I’m also planning on adding a 12-volt house battery system, because 12-volt power is just so handy to have around.
I haven’t bothered to tote up the costs on this project yet, as doing so would probably spoil some of the fun for me. I think I can safely say that it came in way under the $18,000 I would have spent to get electrical service dropped, so I consider myself ahead of the game. I did invest a tremendous amount of time in this build; on and off over the last three years, I’d estimate I’ve got a couple of hundred hours into it. But it was a real skill-builder for me, and for that reason alone I’m glad I tackled it. That I ended up with the ability to generate and store power is just icing on the cake.